 I was lucky enough to amass a glut of apples last Autumn, (thank you friends with apple trees). I stewed them with sugar and spices then froze to use over the winter. They’ve been really useful. I’ve used them for pies, apple sauce (with pork and or sausages) and now apple tart.
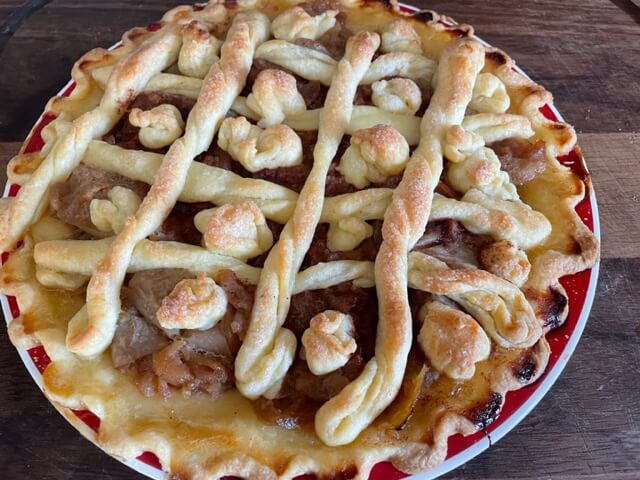
In my image, the apples look a tad dark, this is because I stewed them with brown sugar, It made no difference to the taste. Next Autumn, I’ll probably just stew them with white sugar so they don’t turn out quite so dark.
I was having one of my rummages in the freezer the other day looking for inspiration and found the last batch, so decided to make an apple pie with some left over pastry. Didn’t quite have enough pastry to do a top and a bottom to the pie, so made a ‘tart’ instead. It’s a really easy to make desert and can be prepared and cooked in about 40-50 minutes.
I’ll add a recipe for stewed apples later on in the year. They are very easy to make, and if you have friends with apple trees who are happy for you to take over the glut they probably have then they are also very cheap to make.
Ingredients
- Stewed apples
- Short cut pastry, I used ready rolled from Lidl, but its really easy to make yourself, and to be honest is cheaper to do so.
- Milk to glaze
- Sprinkle of sugar
- Cinnamon and/or mixed spice
 Method
I use old plates for tarts etc, there’s absolutely no need to buy specific tart or pie dishes. Old plates are great for baking pies etc.
- Very lightly grease the plate with oil. Literally wipe it on with kitchen towel, then wipe it off again. This is to ensure the pastry doesn’t stick to the plate when cooked.
- Roll or lay your pastry across the plate. If you’ve made your own pastry it needs to be about .5cm thick. Then cut the overhanging pastry so it’s fitting snuggly on the plate.
- Once I’ve laid my pastry out, I always like to ‘flute’ the edges. It’s something my mum always used to do, so I guess I just carried it on. I’m demonstrating in this image how to do it. (On a different tart). Just go round the edge of the pastry, use your thumb and forefinger to pinch the pastry and use the forefinger on your other hand to gently push the pastry. It gives your tart a really nice effect.
- Some people now bake their pastry blind. This means they cook the pastry in the oven so it is lightly browned. This is to ensure (As Mary Berry would say), you don’t get a saggy bottom. To be honest, I don’t bother, I’ve never had a problem with the bottom of my tarts being soggy and it cuts down on energy bills when you’re not baking the pastry twice.
- Now add the apple mixture. Spread it evenly making sure you take it near the edge of the plate. (Not too close though as you don’t want it to spill over the sides when cooking).
- You could now add further sweet spices {cinnamon or mixed spice). I didn’t as I had already used plenty when stewing the apples.
- You should have some left over pastry. If I was ‘posh’ I’d now cut it into measured strips and ‘lattice’ them over the pie. I’m not posh, (just lazy), so this is how I do it.
I just cut strips from the pastry lengthwise so they are roughly the same size then roll/twist them so they will lay across the plate. Add the strips over the top length and sideways so it looks roughly lie a lattice. Then to avoid wasting any of the pastry, I used the ends from the strips I laid across the tart, rolled them into balls and placed them in the gaps. (Don’t waste those bits of pastry).
- Glaze your tart with the milk and add the sprinkle of sugar.
Finally, put your tart in a preheated oven, electric fan assisted 140-60, just a tad higher for non fan assisted. If using gas, 5-6 for about 15-20 minutes. Check the tart after 15 minutes to make sure it’s not browning too quickly. Turn the oven down to about 140, Gas 2-3 until the pastry is nice and brown.
I served my tart with hot custard. It went down a real treat with hubs and the kids. It would also be really tasty served with ice cream, squirty or fresh cream.